FordParts
My Garage
My Account
Cart
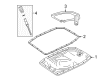
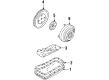
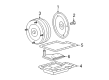
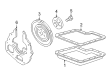
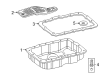
OEM Ford Transmission Pan
Trans Pan- Select Vehicle by Model
- Select Vehicle by VIN
Select Vehicle by Model
orMake
Model
Year
Select Vehicle by VIN
For the most accurate results, select vehicle by your VIN (Vehicle Identification Number).
34 Transmission Pans found


Ford Oil Pan Part Number: 6L3Z-7A194-A
$38.21 MSRP: $54.67You Save: $16.46 (31%)Ships in 1-3 Business DaysProduct Specifications- Other Name: Pan Assembly - Transmission Oil; Transmission Oil Pan; Automatic Transmission Oil Pan; Transmission Pan
- Replaces: F6AZ-7A194-A


Ford Transmission Pan Part Number: 9L3Z-7A194-A
$53.35 MSRP: $81.95You Save: $28.60 (35%)Ships in 1-2 Business DaysProduct Specifications- Other Name: Pan Assembly - Transmission Oil; Transmission Oil Pan; Automatic Transmission Oil Pan
- Manufacturer Note: Less Magnet
- Replaces: 6L2Z-7A194-CA, 7L1Z-7A194-A


Ford Oil Pan Part Number: BR3Z-7A194-A
$56.91 MSRP: $82.83You Save: $25.92 (32%)Ships in 1 Business DayProduct Specifications- Other Name: Pan Assembly - Transmission Oil; Transmission Oil Pan; Automatic Transmission Oil Pan; Transmission Pan
- Manufacturer Note: For Warranty Replacement Only
- Replaces: HC3Z-7A194-A


Ford Oil Pan Part Number: F69Z-7A194-AA
$68.77 MSRP: $100.10You Save: $31.33 (32%)Ships in 1-3 Business DaysProduct Specifications- Other Name: Pan Assembly - Transmission Oil; Transmission Oil Pan; Automatic Transmission Oil Pan; Transmission Pan
- Replaces: F5TZ-7A194-A


Ford Oil Pan Part Number: F69Z-7A194-BA
$69.15 MSRP: $100.65You Save: $31.50 (32%)Ships in 1-3 Business DaysProduct Specifications- Other Name: Pan Assembly - Transmission Oil; Transmission Oil Pan; Automatic Transmission Oil Pan; Transmission Pan


Ford Transmission Pan Part Number: BB5Z-7A194-B
$71.54 MSRP: $104.13You Save: $32.59 (32%)Ships in 1-3 Business DaysProduct Specifications- Other Name: Pan Assembly - Transmission Oil; Automatic Transmission Cover; Transmission Oil Pan; Automatic Transmission Oil Pan; Side Cover
- Replaces: BB5Z-7A194-A


Ford Transmission Pan Part Number: 8A8Z-7G004-A
$78.72 MSRP: $114.58You Save: $35.86 (32%)Product Specifications- Other Name: Cover; Automatic Transmission Cover; Automatic Transmission Oil Pan; Side Cover
- Replaces: 7T4Z-7G004-B, 9E9Z-7G004-A


Ford Transmission Pan Part Number: 4W4Z-7A194-AA
$80.23 MSRP: $116.78You Save: $36.55 (32%)Ships in 1-3 Business DaysProduct Specifications- Other Name: Pan Assembly - Transmission Oil; Transmission Oil Pan; Automatic Transmission Oil Pan
- Replaces: 1W4Z-7A194-AA


Ford Transmission Pan Part Number: 5F9Z-7A194-B
$92.20 MSRP: $134.20You Save: $42.00 (32%)Ships in 1-3 Business DaysProduct Specifications- Other Name: Pan Assembly - Transmission Oil; Transmission Oil Pan; Automatic Transmission Oil Pan


Ford Transmission Pan Part Number: F81Z-7A194-BA
$44.50 MSRP: $63.67You Save: $19.17 (31%)Product Specifications- Other Name: Pan Assembly - Transmission Oil; Transmission Oil Pan; Automatic Transmission Oil Pan
- Replaces: F7TZ-7A194-CB, F7UZ-7A194-AB


Ford Oil Pan Part Number: BC3Z-7A194-D
$50.33 MSRP: $72.00You Save: $21.67 (31%)Ships in 1 Business DayProduct Specifications- Other Name: Pan Assembly - Transmission Oil; Transmission Oil Pan; Automatic Transmission Oil Pan; Transmission Pan
- Replaces: BC3Z-7A194-B, BC3Z-7A194-C


Ford Transmission Pan Part Number: XS4Z-7A194-AB
$49.47 MSRP: $70.77You Save: $21.30 (31%)Product Specifications- Other Name: Pan Assembly - Transmission Oil; Transmission Oil Pan; Automatic Transmission Oil Pan

Ford Oil Pan Part Number: LP5Z-7A194-B
$85.14 MSRP: $123.93You Save: $38.79 (32%)Ships in 1-2 Business DaysProduct Specifications- Other Name: Pan Assembly - Transmission Oil; Transmission Oil Pan; Automatic Transmission Oil Pan; Transmission Pan
- Replaces: LP5Z-7A194-A

Ford Oil Pan Part Number: 7L1Z-7A194-A
$53.35 MSRP: $81.95You Save: $28.60 (35%)Ships in 1-2 Business DaysProduct Specifications- Other Name: Pan Assembly - Transmission; Transmission Oil Pan; Automatic Transmission Oil Pan; Transmission Pan; Pan Assembly - Transmission Oil
- Manufacturer Note: With Magnet
- Replaced by: 9L3Z-7A194-A


Ford Transmission Pan Part Number: F1CZ-7A194-A
Product Specifications- Other Name: Pan Assembly - Transmission Oil; Automatic Transmission Oil Pan


Ford Oil Pan Part Number: 8C3Z-7A194-B
$55.65 MSRP: $81.00You Save: $25.35 (32%)Product Specifications- Other Name: Pan Assembly - Transmission Oil; Transmission Oil Pan; Automatic Transmission Oil Pan; Transmission Pan
- Manufacturer Note: PAN ASM TRANS OIL


Ford Transmission Pan Part Number: 7L5Z-7A194-B
Product Specifications- Other Name: Pan Assembly - Transmission Oil; Transmission Oil Pan; Automatic Transmission Oil Pan

Ford Transmission Pan Part Number: 7L5Z-7A194-A
Product Specifications- Other Name: Pan Assembly - Transmission Oil; Transmission Oil Pan; Automatic Transmission Oil Pan


Ford Transmission Pan Part Number: 4F1Z-7A194-AA
Product Specifications- Other Name: Pan Assembly - Transmission Oil; Transmission Oil Pan; Automatic Transmission Oil Pan
- Replaces: YF1Z-7A194-AA


Ford Oil Pan Part Number: 1L2Z-7A194-CA
Product Specifications- Other Name: Pan Assembly - Transmission Oil; Transmission Oil Pan; Automatic Transmission Oil Pan; Transmission Pan
| Page 1 of 2 |Next >
1-20 of 34 Results
Ford Transmission Pan
If you own Ford and want to keep it in top shape, choosing OEM Transmission Pan is a smart move. They are precisely engineered and follow strict factory standards. They are made in advanced facilities that use cutting edge technology. Each part goes through thorough testing to confirm strength and safety, so you can trust it. FordPartsDeal.com gives you genuine Ford Transmission Pan at some of the affordable online prices without cutting quality. Every OEM Ford part includes the manufacturer's warranty, easy returns, and super-fast delivery. So why wait? Shop now and get your vehicle back to peak condition.
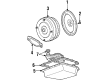
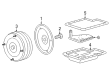
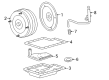
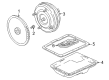
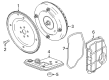
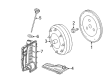
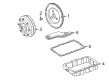
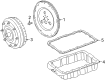
Ford Transmission Pan prevents the leakage of fluid and protects gears against heat disintegration. Since its establishment in 1903, Ford applied moving assembly line to reduce build time and cost of the vehicles as environmental factors but retained toughness and practicality. Now Ford is pushing EcoBoost and squeezing turbo punch and thrift out of small engines to allow drivers to experience acceleration without hurting their wallets. Cabs obtain SYNC voice technology because Ford allows drivers to play music and navigation without losing control on the road. Safety is the leader since Ford equips cars with Co-Pilot360 lane notifications, automatic braking, and an electric Lightning option to purify tailpipe fumes. The Transmission Pan is a stamped steel sump that is suspended under the gearbox and holds the fluid that is channeled through the filter and dissipated to keep clutch packs cool when the tow or crawl is slow. Since the Transmission Pan is a closed bowl, the leak-proof gasket line prevents leakages that will starve the pumps and fry gears off in a few minutes. Corrosion-resistant finishes allow the Transmission Pan to repel road salt, gravel and lengthen service life and maintain underbody checks fast and clean. Homeowners can also replace fluid by using the Transmission Pan drain plug which avoids dropping the entire unit and reduces mess, time and cost.
Ford Transmission Pan Parts and Q&A
- Q: How to Service and Repair the Transmission Pan on Ford Ranger?A:The first step for servicing or repairing the fluid pan involves disconnecting the battery ground cable and properly supporting the vehicle while raising it. A drain pan needs placement underneath the transmission fluid pan to allow transmission fluid draining. No more than two of the transmission fluid pan bolts should remain while you loosen these bolts situated at the front. Open the rear side of the transmission fluid pan to enable fluid leakage before unfastening the two front bolts and removing the pan. Once you remove the screw and transmission fluid filter as well as the transmission fluid pan gasket you must discard them all. Thoroughly clean all surfaces of the transmission fluid pan and magnet before checking for complete mating surface clarity. Flush the transmission fluid cooler and its lines. Before putting in new fluid filter O-rings use Mercon-V Automatic Transmission Fluid XT-5-QM which serves Ford specification Mercon-V because this fluid prevents damaging the components. Place new O-rings onto the transmission fluid filter before securing it on the main control valve body while also avoiding wire harness compression underneath. Fasten the filter using the screw while positioning an oil pan magnet inside the transmission fluid pan. Then install a new gasket onto the pan. Begin by placing the transmission fluid pan screws loosely then fix them by following a diagonal pattern. Lower the vehicle before reestablishing the battery ground cable connection. The first fluid addition for a new and empty transmission and converter system must begin with 3.7 liters of Mercon V Automatic Transmission Fluid XT-5-QM that satisfies Ford requirements for Mercon V. Verify fluid level and test transmission performance after filling.
- Q: How to Service and Repair the Automatic Transmission Filter and Transmission Pan for the 5R55S Transmission on Ford Mustang?A:Place the vehicle onto a hoist that is set to neutral for servicing and repairing the 5R55S transmission fluid filter. The service begins with drain transmission fluid through drain plug removal before throwing away the transmission fluid pan gasket. Sever the heated oxygen sensor (HO2S) connectors and retaining clip which connect to the right transmission fluid pan rail before setting the connectors to the side. You should detach the HO2S connector which is located at the front of the transmission fluid pan rail. A serviceable transmission fluid pan gasket can be retained when clean and in good condition but needs replacement in all other cases. Disable the transmission fluid pan and its gasket before disposing of the transmission fluid filter. After cleaning the transmission fluid pan you should check its condition before reinstalling it with the magnet. A new transmission filter requires automatic transmission fluid for lubricating its O-ring seals before their correct installation. Possess the filter in place and tight the screws to 10 Nm (89 lb-in) settings. Reposition the transmission fluid pan magnet and install the pan together with its gasket according to the indicated screw placement before conducting a crisscross tightening to 11 Nm (71 lb-in). Reconnect the HO2S connector near the transmission fluid pan rail front then place the sensor wire retaining clip onto the right-hand side. The drain plug installation requires a new gasket before tightening it to 26 Nm (19 lb-ft). Also check the transmission fluid level. The 3/16-inch Allen key can be used to take out the drain plug.


Related Ford Parts
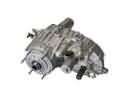 Ford Transfer Case
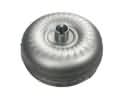 Ford Torque Converter
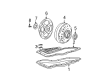
 Ford Flywheel
 Ford Automatic Transmission Shifter
 Ford Clutch Release Bearing
 Ford Clutch Slave Cylinder
 Ford Flywheel Ring Gear
 Ford Transmission Drain Plug
 Ford Automatic Transmission Dipstick
 Ford Automatic Transmission Filter
 Ford Transmission Assembly
 Ford Transmission Fluid Temperature Sensor
Browse Ford Transmission Pan by Models
Ranger Bronco Mustang Explorer Focus Fusion F-150 Edge Excursion Expedition Taurus Thunderbird Flex Transit Connect Explorer Sport Trac Crown Victoria Escort F-250 E-150 Econoline Explorer Sport F-350 Five Hundred Freestar Freestyle Police Interceptor Utility Windstar F-350 Super Duty E-150 E-150 Club Wagon E-150 Econoline Club Wagon E-250 E-250 Econoline E-350 Club Wagon E-350 Econoline E-350 Econoline Club Wagon E-350 Super Duty F-150 Heritage F-250 HD F-250 Super Duty Transit-150 Transit-250 Transit-350 Transit-350 HD