FordParts
My Garage
My Account
Cart
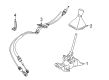
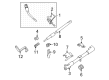
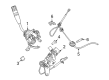
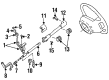
OEM Ford Automatic Transmission Shift Levers
Automatic Transmission Shifter- Select Vehicle by Model
- Select Vehicle by VIN
Select Vehicle by Model
orMake
Model
Year
Select Vehicle by VIN
For the most accurate results, select vehicle by your VIN (Vehicle Identification Number).
351 Automatic Transmission Shift Levers found


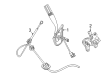
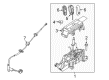
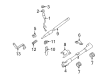
Ford Gearshift Lever Part Number: BC3Z-7210-BA
$74.44 MSRP: $108.35You Save: $33.91 (32%)Ships in 1-3 Business DaysProduct Specifications- Other Name: Lever - Transmission Gear Shift; Automatic Transmission Shift Lever


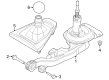
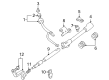
Ford Shift Lever Part Number: F4TZ-7210-B
$101.02 MSRP: $155.47You Save: $54.45 (36%)Ships in 1 Business DayProduct Specifications- Other Name: Shaft - Gear Change
- Replaces: F2TZ-7210-F


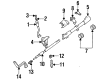
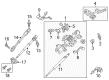
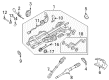
Ford Shifter Assembly Part Number: FR3Z-7210-E
$398.73 MSRP: $625.17You Save: $226.44 (37%)Ships in 1-3 Business DaysProduct Specifications- Other Name: Housing Assembly - Gear Shift
- Replaces: FR3Z-7210-A


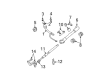
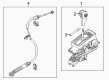
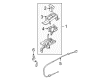
Ford Gear Shift Assembly Part Number: 6C3Z-7210-CA
$122.38 MSRP: $188.33You Save: $65.95 (36%)Product Specifications- Other Name: Lever - Transmission Gear Shift; Automatic Transmission Shift Lever; Manual Transmission Shift Lever; Shift Lever; Gearshift Lever
- Replaces: 5C3Z-7210-CA


Ford Shifter Assembly, Charcoal Black Part Number: 9L3Z-7210-FA
$542.03 MSRP: $803.00You Save: $260.97 (33%)Ships in 1-3 Business DaysProduct Specifications- Other Name: Lever - Gear Shift; Automatic Transmission Shift Lever; Gear Shift Assembly; Shift Lever
- Replaces: 9L3Z-7210-E


Ford Gear Shift Assembly, Red Part Number: BL3Z-7210-CC
$546.98 MSRP: $810.33You Save: $263.35 (33%)Product Specifications- Other Name: Lever - Gear Shift; Shift Lever


Ford Gear Shift Assembly, Dusk Gray Part Number: BL3Z-7210-CB
$546.98 MSRP: $810.33You Save: $263.35 (33%)Product Specifications- Other Name: Lever - Gear Shift; Shift Lever
- Manufacturer Note: Dusk Gray


Ford Shifter Assembly Part Number: BR3Z-7210-BA
$556.88 MSRP: $825.00You Save: $268.12 (33%)Product Specifications- Other Name: Lever - Gear Shift; Automatic Transmission Shift Lever; Gear Shift Assembly; Shift Lever


Ford Shifter Assembly Part Number: DR3Z-7210-BB
$637.31 MSRP: $944.17You Save: $306.86 (33%)Product Specifications- Other Name: Lever - Gear Shift; Automatic Transmission Shift Lever; Shift Lever; Gear Shift Assembly
- Replaces: DR3Z-7210-BA


Ford Shifter Assembly Part Number: CE8Z-7210-A
$81.64 MSRP: $118.83You Save: $37.19 (32%)Product Specifications- Other Name: Lever - Gear Shift; Shift Lever
- Replaces: BE8Z-7210-A, 8A6Z-7210-A


Ford Shift Lever Part Number: EC2Z-7210-AA
$89.55 MSRP: $130.35You Save: $40.80 (32%)Ships in 1 Business DayProduct Specifications- Other Name: Lever - Transmission Gear Shift; Manual Transmission Shift Lever; Gear Shift Assembly


Ford Gear Shift Assembly Part Number: 8C3Z-7210-AA
$92.20 MSRP: $134.20You Save: $42.00 (32%)Ships in 1-2 Business DaysProduct Specifications- Other Name: Lever - Transmission Gear Shift; Shift Lever; Gearshift Lever; Gearshift Housing
- Replaces: 7C3Z-7210-AA


Ford Gear Shift Assembly Part Number: 8C3Z-7210-A
$92.83 MSRP: $135.12You Save: $42.29 (32%)Ships in 1-2 Business DaysProduct Specifications- Other Name: Selector Shaft Assembly; Shift Lever; Gearshift Lever; Gearshift Housing
- Replaces: 7C3Z-7210-A


Ford Shift Lever Part Number: F57Z-7210-C
$106.05 MSRP: $154.37You Save: $48.32 (32%)Product Specifications- Other Name: Shaft - Gear Change; Automatic Transmission Manual Control Lever; Automatic Transmission Shift Lever; Gear Shift Assembly


Ford Shift Lever Part Number: 7C2Z-7210-AA
$111.72 MSRP: $162.62You Save: $50.90 (32%)Ships in 1 Business DayProduct Specifications- Other Name: Lever - Transmission Gear Shift; Automatic Transmission Manual Control Lever; Manual Transmission Shift Lever; Gear Shift Assembly


Ford Shift Lever Part Number: 7C2Z-7210-BB
$119.78 MSRP: $174.35You Save: $54.57 (32%)Ships in 1-2 Business DaysProduct Specifications- Other Name: Lever - Transmission Gear Shift; Manual Transmission Shift Lever; Gear Shift Assembly


Ford Gear Shift Assembly Part Number: 5C3Z-7210-BAB
$127.10 MSRP: $185.00You Save: $57.90 (32%)Ships in 1-2 Business DaysProduct Specifications- Other Name: Lever - Transmission Gear Shift; Shift Lever
- Manufacturer Note: Column shifter - includes button, wiring, and cap and seal (boot), FROM 11/03/04
- Replaces: 4C3Z-7210-BAA


Ford Shift Lever Part Number: 5L1Z-7210-AA
$133.97 MSRP: $195.00You Save: $61.03 (32%)Ships in 1-2 Business DaysProduct Specifications- Other Name: Lever - Transmission Gear Shift; Automatic Transmission Shift Lever; Gear Shift Assembly


Ford Gear Shift Assembly Part Number: 3C3Z-7210-BBA
$156.18 MSRP: $227.33You Save: $71.15 (32%)Ships in 1-2 Business DaysProduct Specifications- Other Name: Lever - Transmission Gear Shift; Shift Lever


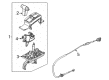
Ford Shift Lever Part Number: 8R3Z-7210-C
$580.39 MSRP: $859.83You Save: $279.44 (33%)Product Specifications- Other Name: Lever - Gear Shift; Automatic Transmission Shift Lever; Automatic Transmission Shifter Cable; Shifter Assembly; Shift Control Cable
- Replaces: 7R3Z-7210-J, 7R3Z-7210-E
| Page 1 of 18 |Next >
1-20 of 351 Results
Ford Automatic Transmission Shift Levers
If you own Ford and want to keep it in top shape, choosing OEM Automatic Transmission Shift Levers is a smart move. They are precisely engineered and follow strict factory standards. They are made in advanced facilities that use cutting edge technology. Each part goes through thorough testing to confirm strength and safety, so you can trust it. FordPartsDeal.com gives you genuine Ford Automatic Transmission Shift Levers at some of the affordable online prices without cutting quality. Every OEM Ford part includes the manufacturer's warranty, easy returns, and super-fast delivery. So why wait? Shop now and get your vehicle back to peak condition.
Ford Automatic Transmission Shift Levers provide motorists with sharp gear changes to maintain momentum that is consistently smooth and predictable. In 1913, Ford reinvented mass production, with the so-called moving line, which showed that speed, equal quality, and pocket-friendly prices can coexist even in the families of ordinary people, on different continents and over decades. Ford drives forward with turbocharged EcoBoost power engines, SYNC voice control which does not require people to conduct a conversation like it would on the phone, Co-Pilot360 assists which can brakes even before unexpected metal messiness on the freeways. Electric pickups is being introduced by Ford, which drains fewer electrons, fumes in the air tailpipe reduced to zero, and the load of lumber, camping gear, or sports equipment carried in the trunk is courageously carried into the air. Ford continues to integrate fuel-saving, online intelligence, and roadside proving durability across the board ensuring that teenagers, commuters and towing enthusiasts all feel like they are behind the wheel on a daily basis whether it be snow, rain or scorching sun. Automatic Transmission Shift Levers connect driver intent to transmission internals, via a sturdy pivot, detent gates and in newer trims electronic wire control which limits mechanical drag, reduces throws and eliminates shift hunting during climbs. Automatic Transmission Shift Levers retain the widespread PRNDL logic, but cleverly pack wiring and brackets so as not to obstruct the cabin space and reduce rattles. Automatic Transmission Shift Levers undergo testing that replicates years of heat, vibration and slamming to ensure that the lever remains locked in place firmly at each stop. Automatic Transmission Shift Levers thus become silent work horses that shield the gearboxes but allowing drivers to concentrate on the road.
Ford Automatic Transmission Shift Levers Parts and Q&A
- Q: How to Service and Repair Automatic Transmission Shift Levers on Ford Mustang?A:A technician should start automatic transmission shifter servicing and repairs by hoisting the vehicle into neutral position. The automatic transmission shift lever cable should be removed from its positions at both the automatic transmission shift lever and bracket with the clip thrown out. Start by removing the center console automatic transmission shift lever trim followed by uninstalling the two screws which maintain the center console top finish panel. The driver and passenger kick panels of the center console need removal while the console bin needs two screws removed from its base and two screws at its front to be removed before the console can be lifted for servicing. Acts of lifting the console and disconnecting the electrical power connector reveal the removal of the console piece. The disconnect of the automatic transmission shift lever electrical connector should precede removal of two nuts and two screws before slowly lifting the transmission automatic transmission shift lever assembly from the vehicle. Put the transmission automatic transmission shift lever housing assembly into the vehicle position then fasten it with two nuts and two screws while applying torque at 9 Nm (80 lb-in). Before putting back the driver console you must reconnect the power point electrical connector alongside the automatic transmission shift lever electrical connector. Fasten the console by securing two screws at the front of the console bin while installing the other two screws at the bottom section. First reinstall the driver kick panel along with the passenger kick panel before putting back the center console top finish with its installed screws. Complete the automatic transmission shift lever trim installation by using a new plastic clip for the automatic transmission shift lever cable then insert it into the bracket before securing it on the lever to lock the adjustment lock. Check that the automatic transmission shift lever cable has its proper adjust position.
- Q: How to Service and Repair Automatic Transmission Shift Levers on Ford Ranger?A:The service and repair of the automatic transmission shifter requires removing the ignition switch lock cylinder then disassembling upper steering column shroud and rubber shift lever cover. The service process begins with disconnecting the shift control automatic transmission shift levers harness connector and removing and discarding the gearshift lever pin before guiding out the gearshift lever. When replacing the gearshift lever pin always keep it in the installation and then perform the process in reverse order following removal.


Related Ford Parts
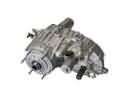 Ford Transfer Case
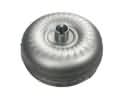 Ford Torque Converter
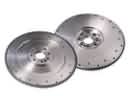 Ford Flywheel
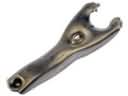 Ford Clutch Fork
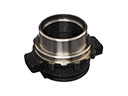 Ford Clutch Release Bearing
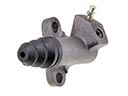 Ford Clutch Slave Cylinder
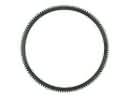 Ford Flywheel Ring Gear
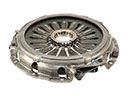 Ford Pressure Plate
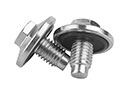 Ford Transmission Drain Plug
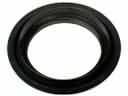 Ford Automatic Transmission Seal
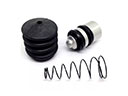 Ford Clutch Slave Repair Kit
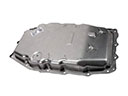 Ford Transmission Pan
Browse Ford Automatic Transmission Shift Levers by Models
Ranger Bronco Mustang Explorer Focus Fusion F-150 Maverick Escape Edge Excursion Expedition Fiesta Taurus Thunderbird Flex Transit Connect Bronco Sport Explorer Sport Trac Crown Victoria EcoSport Escort F-250 Aerostar C-Max Contour E-150 Econoline Explorer Sport F-350 Five Hundred Freestar Freestyle Mustang Mach-E Police Interceptor Utility Taurus X Windstar F-350 Super Duty Police Interceptor Sedan E-150 E-150 Club Wagon E-150 Econoline Club Wagon E-250 E-250 Econoline E-350 Club Wagon E-350 Econoline E-350 Econoline Club Wagon E-350 Super Duty F-150 Heritage F-150 Lightning F-250 HD F-250 Super Duty Police Responder Hybrid Special Service Police Sedan SSV Plug-In Hybrid Transit-150 Transit-250 Transit-350 Transit-350 HD